In today’s fast-paced trading environment, having access to real-time market data and generating actionable trading signals can significantly enhance decision-making and improve trading strategies. Python’s extensive library ecosystem makes it an excellent choice for building automated trading tools. In this article, we explore how to use the yfinance library to fetch market data, generate trading signals using moving average crossovers, and simulate real-time signal execution.
Setting Up the Environment
Before diving into coding, ensure that your development environment is ready. Follow these steps:
1. Install Python: Download and install Python from the official Python website.
2. Create a Virtual Environment: Isolate your project dependencies:
python -m venv trading-signals-env
source trading-signals-env/bin/activate  # On Windows use: trading-signals-env\Scripts\activate
3. Install Required Libraries: Install yfinance (and pandas, if not already installed):
pip install yfinance pandas matplotlibFetching Real-Time Market Data
While yfinance is primarily used for historical data, it also allows access to near real-time data through minute-level updates. Note that yfinance does not support a period of "1m"; instead, you must use a valid period like "1d" with an interval parameter set to "1m".
Example: Retrieving the Latest Price for Apple Inc. (AAPL)
import yfinance as yf

# Create a ticker object for Apple Inc.
ticker = yf.Ticker("AAPL")

# Fetch minute-level data for the current day using period "1d" and interval "1m"
live_data = ticker.history(period="1d", interval="1m")

if not live_data.empty:
    # Get the most recent closing price from the data
    live_price = live_data["Close"].iloc[-1]
    print("Real-Time Price:", live_price)
else:
    print("No live data available.")
This code retrieves one day’s worth of minute-level data. If available, it prints the latest closing price. If no data is returned, it notifies the user accordingly.
Sample output:
Real-Time Price: 233.22000122070312Generating Trading Signals
A common strategy for automated trading is the moving average crossover. This strategy generates:
- A buy signal when a short-term moving average crosses above a long-term moving average.
- A sell signal when the short-term moving average crosses below the long-term moving average.
Step 1: Define a Moving Average Calculation
def calculate_moving_average(prices, window=5):
    """Calculate the simple moving average over a specified window."""
    return prices.rolling(window=window).mean()
Step 2: Fetch Historical Data for Analysis
To generate reliable signals, fetch historical data spanning several days. Here, we use five days of minute-level data:
# Fetch historical data for the past 5 days with 1-minute intervals
historical_data = ticker.history(period="5d", interval="1m")
Step 3: Calculate Moving Averages and Generate Signals
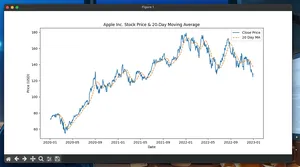
# Calculate short-term (5-minute) and long-term (20-minute) moving averages
historical_data['Short_MA'] = calculate_moving_average(historical_data['Close'], window=5)
historical_data['Long_MA'] = calculate_moving_average(historical_data['Close'], window=20)

# Initialize signals to 0 (neutral)
historical_data['Signal'] = 0

# Generate signals:
# Buy signal (1) when the short-term MA is above the long-term MA
# Sell signal (-1) when the short-term MA is below the long-term MA
historical_data.loc[historical_data['Short_MA'] > historical_data['Long_MA'], 'Signal'] = 1
historical_data.loc[historical_data['Short_MA'] < historical_data['Long_MA'], 'Signal'] = -1

# Display the updated DataFrame with signals
print(historical_data.tail())
This snippet calculates two moving averages and then assigns trading signals based on their crossover behavior. Using .loc for assignments avoids common warnings and ensures the DataFrame is correctly updated.
Simulating Real-Time Signal Execution
In a live trading environment, these signals would trigger orders through a brokerage API (e.g., Alpaca or Interactive Brokers). For demonstration purposes, we simulate execution by printing each signal along with its corresponding price and timestamp.
def execute_trading_signals(data):
    """
    Simulate executing trading signals by iterating through the data.
    A buy signal (1) triggers a simulated 'Buy' order, and a sell signal (-1) triggers a 'Sell' order.
    """
    for index, row in data.iterrows():
        if row['Signal'] == 1:
            print(f"Buy signal for {ticker.ticker} at {row['Close']:.2f} on {index}")
        elif row['Signal'] == -1:
            print(f"Sell signal for {ticker.ticker} at {row['Close']:.2f} on {index}")

# Simulate execution of signals
execute_trading_signals(historical_data)
In production, this function would interface with a brokerage API to place live orders. The simulation here simply prints the signals for review.
Full Example
Below is a complete Python script that combines all the steps—from fetching near real-time and historical data using yfinance, calculating moving averages, generating trading signals, and simulating signal execution. You can copy and run this code in your environment after installing the required libraries.
import yfinance as yf
import pandas as pd

def calculate_moving_average(prices, window=5):
    """
    Calculate the simple moving average (SMA) over a specified window.

    Parameters:
        prices (pd.Series): A pandas Series of prices.
        window (int): The number of periods to average.

    Returns:
        pd.Series: The SMA of the input prices.
    """
    return prices.rolling(window=window).mean()

def execute_trading_signals(ticker_symbol, data):
    """
    Simulate executing trading signals by iterating through the DataFrame.
    A buy signal (1) prints a simulated 'Buy' order and a sell signal (-1)
    prints a simulated 'Sell' order.

    Parameters:
        ticker_symbol (str): The stock ticker symbol.
        data (pd.DataFrame): The DataFrame containing signal data.
    """
    for index, row in data.iterrows():
        if row['Signal'] == 1:
            print(f"Buy signal for {ticker_symbol} at {row['Close']:.2f} on {index}")
        elif row['Signal'] == -1:
            print(f"Sell signal for {ticker_symbol} at {row['Close']:.2f} on {index}")

def main():
    # Define the ticker symbol for Apple Inc.
    ticker_symbol = "AAPL"
    ticker = yf.Ticker(ticker_symbol)

    # Fetch near real-time data: 1 day of minute-level data.
    try:
        live_data = ticker.history(period="1d", interval="1m")
        if not live_data.empty:
            live_price = live_data["Close"].iloc[-1]
            print("Real-Time Price:", live_price)
        else:
            print("No live data available.")
    except Exception as e:
        print("Error fetching live data:", e)

    # Fetch historical data for the past 5 days with 1-minute intervals.
    try:
        historical_data = ticker.history(period="5d", interval="1m")
    except Exception as e:
        print("Error fetching historical data:", e)
        return

    # Calculate short-term (5-minute) and long-term (20-minute) moving averages.
    historical_data['Short_MA'] = calculate_moving_average(historical_data['Close'], window=5)
    historical_data['Long_MA'] = calculate_moving_average(historical_data['Close'], window=20)

    # Generate trading signals:
    # - Signal 1 indicates a buy signal when Short_MA > Long_MA.
    # - Signal -1 indicates a sell signal when Short_MA < Long_MA.
    # - Signal 0 indicates a neutral condition.
    historical_data['Signal'] = 0
    historical_data.loc[historical_data['Short_MA'] > historical_data['Long_MA'], 'Signal'] = 1
    historical_data.loc[historical_data['Short_MA'] < historical_data['Long_MA'], 'Signal'] = -1

    # Display a sample of the historical data with calculated signals.
    print("\nSample of historical data with signals:")
    print(historical_data.tail())

    # Simulate the execution of trading signals.
    print("\nSimulated Trading Signals:")
    execute_trading_signals(ticker_symbol, historical_data)

if __name__ == "__main__":
    main()
Enhancing and Extending Your Trading Strategy
While this article covers a simple moving average crossover strategy, there are numerous ways to extend and refine your approach:
- Additional Technical Indicators: Combine moving averages with other indicators like Relative Strength Index (RSI), Bollinger Bands, or MACD for more robust signals.
- Backtesting: Utilize libraries such as backtrader or zipline to assess historical performance.
- Risk Management: Implement stop-loss, take-profit, and position sizing strategies to better manage trading risk.
- Live Trading Integration: Connect your signal generator with broker APIs to enable real-time order execution. This requires robust error handling, secure authentication, and adherence to trading regulations.
Best Practices and Considerations
- Data Frequency: yfinance provides near real-time data through minute-level updates. For true live streaming data, especially for high-frequency trading, consider dedicated data providers.
- Error Handling: Always incorporate error handling to manage potential network issues, missing data, or API changes.
- Validation: Thoroughly backtest and validate your strategy using historical data before deploying it in a live environment.
- Compliance: Ensure your automated trading system complies with local financial regulations and understand the inherent risks associated with algorithmic trading.
Conclusion
Leveraging Python and yfinance, generating near real-time trading signals is a manageable and powerful task. By fetching minute-level data using a valid period and interval, calculating moving averages, and simulating trade execution, you build the core components of an automated trading system. Although we focused on a simple moving average crossover strategy, Python’s flexibility allows you to integrate a variety of technical indicators, implement risk management protocols, and even connect with live brokerage APIs.
Armed with these tools and best practices, you can create a dynamic trading ecosystem that adapts to real-market conditions, ultimately enhancing your trading decisions and performance.
Happy coding and successful trading!