Steam allows users to control the download speed or bandwidth usage to ensure that other devices or applications on the network are not affected by heavy downloads. Here’s a step-by-step guide to help you limit download speed on Steam.
Step 1: Open Steam Settings
- Launch the Steam Client:
- Open the Steam desktop application and log in to your account if required.
- Access Settings:
- Click on Steam in the top-left corner of the client.
From the dropdown menu, select Settings (on Windows) or Preferences (on macOS).
.webp)
Step 2: Navigate to the Downloads Section
- Go to Downloads:
In the Settings menu, select Downloads from the left-hand sidebar.
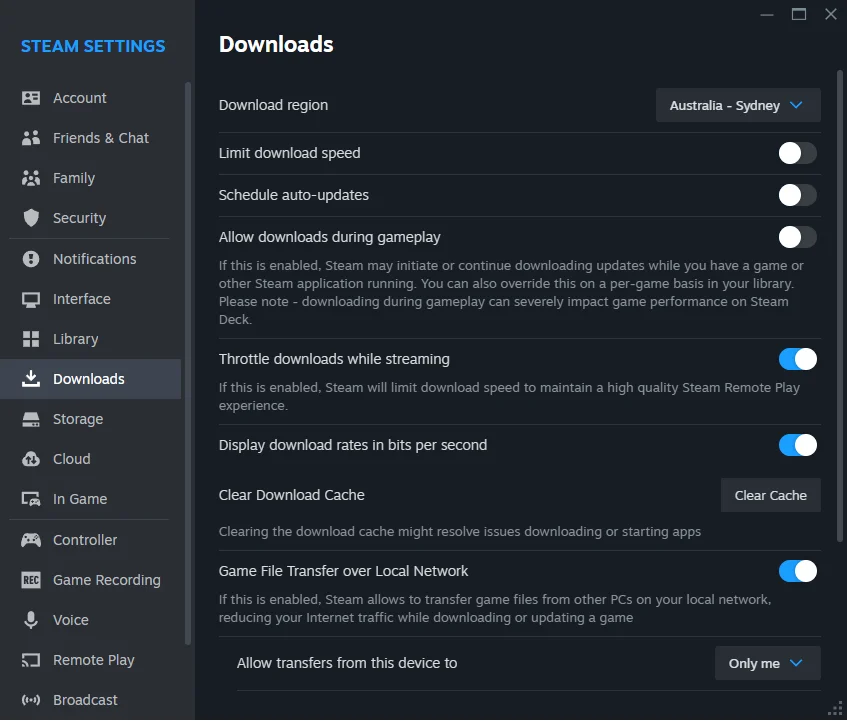
Step 3: Limit the Download Speed
- Set Bandwidth Limit:
- In the Downloads section, find the Download Restrictions area.
Check the box labeled Limit bandwidth to and enter the desired speed limit (e.g., 500 KB/s, 1 MB/s).
.webp)
Step 4: Schedule Downloads (Optional)
- Enable Update Download Scheduling:
- In the same Downloads section, check the box labeled Schedule auto-updates and specify the time range.
This can help manage bandwidth during peak usage hours.
.webp)
Step 5: Monitor Active Downloads
- Check the Download Manager:
- Go to the Library tab and click on Downloads in the bottom-left corner to monitor your active downloads.
- Ensure the download speed is consistent with the limit you set.
Tips for Managing Download Speed
- Pause and Resume: Pausing downloads during high network usage periods can help maintain network stability.
- Prioritize Updates: Steam allows you to prioritize specific game updates or downloads in the Download Manager.
- Test Network Speed: If downloads are slower than the set limit, check your internet connection for issues.
By following these steps, you can easily limit the download speed or bandwidth usage on Steam, ensuring a smoother experience for other online activities on your network.
-1.webp)
-1.webp)

-1.webp)
-1.webp)
-1.webp)
-1.webp)
-1.webp)
-1.webp)
-2.webp)
-2.webp)
-1.webp)